How to Reconnect Cut LED Strip Without Connector?
LED light strips have become a versatile tool for DIY enthusiasts and lighting designers. Their thin, flexible build makes them perfect for decorating furniture, illuminating recesses, and creating unique lighting effects. When you cut an LED strip without a connector, how to reconnect the cut LED light strip.
This guide will walk you through the process of reconnecting a cut LED strip lights without a connector, providing flexibility and endless customization possibilities for your LED light strip lighting setup.
Gathering All Tools You Need
After we cut the LED strip (without the connector), we need to solder the LED strip. Before we start, you need to gather the following tools and materials:
- LED strip
- Tools for cutting
- Soldering iron
- Wire strippers
- Heat gun or lighter
- Wire
- Solder wire
- Heat shrink tubing
- Power supply or LED controller
- Electrical tape (optional)
Step-by-Step Guide to Connecting LED Strip Lights Without a Connector
Once you have gathered all the necessary materials, you can follow these steps to reconnect the cut LED strips:
1. Measure the location
First, you need to plan where the LED strips will be placed(indoor or outdoor). Determine the exact length you need and where you need to cut. Use a measuring tape to accurately measure the area where the LED strip will be placed.
2. Cutting the LED Strips
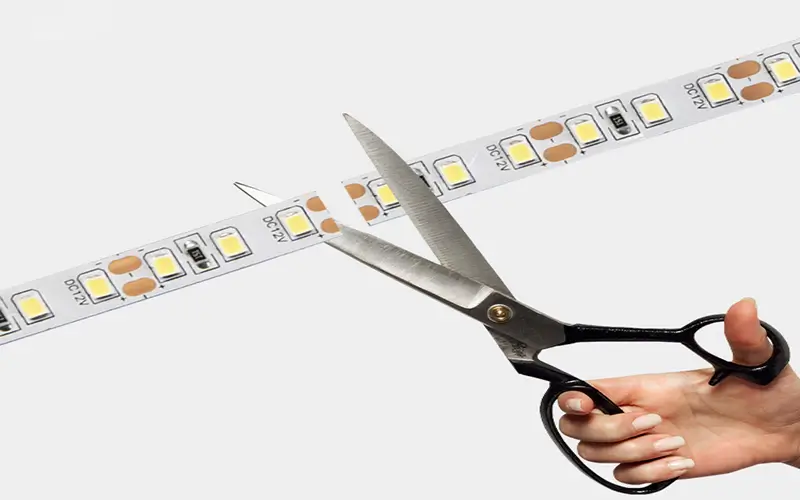
The LED strips have designated cutting points on them. The cuts are different for 12V and 24V LED strips. You will need to use sharp scissors to cut along these lines to ensure an exact fit. Make sure to cut straight along the marked lines for a better connection later on.
3. Preparing the LED Strip
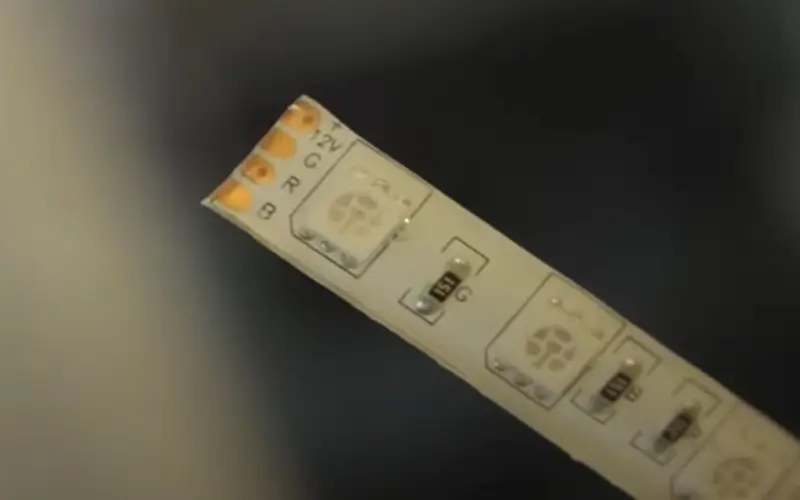
Find the solder pads on the cut ends of the LED strip. If this is for an outdoor waterproof LED light strip, you will also need to carefully cut away all of the silicone covering with scissors, being careful not to damage the strip itself. You will need to find the small copper pads that correspond to the positive (+) and negative (-) power connections of the LED strip.
4. Strip and Tin the Wires
- Use wire strippers to remove the insulation and cut two short pieces of solid wire, about 2-3 inches each.
- Use wire strippers to strip about 1/4 inch of insulation from both ends of the wire.
- To prevent fraying, heat the soldering iron and bring it to the tip of the wire. Then, place a small amount of solder onto the wire, which will melt and completely cover the exposed wire.
5. Solder the Wires to the LED Strip
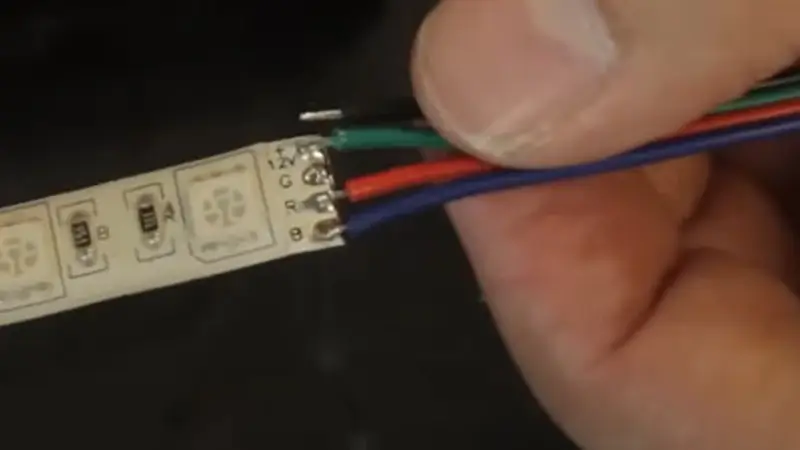
Ensure the positive wire is connected to the positive pad on the strip and the negative wire to the negative pad. Secure the wire and LED strip in place with tape, making sure the tinned wire end overlaps the copper pad on the strip.
Heat the wire and pad with the soldering iron to melt the solder, forming a solid connection. Once the solder appears shiny and the connection is made, remove the heat and let it cool without moving the components.
6. Connect the Power Supply
After the solder has cooled, connect the LED strip to a power supply that matches its voltage requirements. While you’re at it, make sure the connections are secure and that the power supply is rated appropriately for the LED strip.
7. Test the Connection
After connecting the power, check for loose wires or solder joints. If everything is connected correctly, all LEDs should light up.
You can gently bend the LED tape again to check for flickering or brightness changes, which may indicate a loose connection. Gently bend the light strip and see if the bulbs flicker or change in brightness. This will indicate any loose connections.
8. Secure and Insulate the Connection
Finally, it is best to cover the soldered connections with electrical tape. Wrap the tape tightly around the wires and connections, overlapping each layer slightly to ensure complete coverage. Extend the tape to each side of the soldered connection and press firmly to ensure a secure fit.
Precautions for Soldering LED Strips
- When using a soldering iron, always wear safety glasses to protect your eyes from flying debris and hot solder splatter.
- Make sure your soldering iron is completely cool before placing it on a stable surface.
- Be careful with hot components during soldering. Allow everything to cool before handling.
- When working with flammable materials such as heat shrink tubing, be careful with heat sources and maintain proper ventilation.
Summary
Rewiring a cut LED strip without connector may seem a little complicated, but it is completely doable on your own. By following these steps, you can customize your LED lighting setup to fit any space, ensuring a seamless and professional look. Whether you are decorating your living room, bedroom, or any other area, your DIY LED strip will provide functionality and beauty.
For more tips and high-quality LED Strip lights products, visit ESSENLED and explore our wide range of lighting solutions designed to meet all your customization needs.
FAQs
Yes, you can do this with quick connectors. In the absence of connectors, you will need to solder the wires yourself. This usually involves soldering the wires directly to the exposed copper pads on the LED strip. It is a simple process but requires some basic tools and safety precautions.
It is safe and secure to reconnect an LED strip without connectors as long as you follow proper safety procedures. You will need to make sure all connections are secure as well as verify that the power source matches the voltage of the LED strip.
First carefully remove any silicone coating to expose the copper pads. Apply a small amount of solder to the stripped ends to tin the wires. Then, heat the copper pads and tinned wire ends with a soldering iron so that the solder melts and forms a secure connection.
Yes, but heat shrink tubing provides a safer and more professional finish. Heat shrink tubing insulates the connection better and is more durable than electrical tape.
First look at the type of LED strip, whether it is single color, dual color, or RGB. Then use the wire that is the same gauge as the LED strip. Typically, 22 to 18 gauge wire works well for most LED strip connections. Make sure the wire can handle the current and voltage requirements of the LED strip.

